This month's challenge was to use Echo Park paper or stickers and our favorite Cricut cartridge. My inspiration for this challenge was Subway art. I saw a layout online that had used pens with their Cricut to create the subway art, but I don't have any pens to use with mine so my first thought was using the same color paper and just layer it on top. That resulted in something very hard to read so I switched it to the turquoise to match my little one's shirt. I used the Echo Park Little Boy collection paper to coordinate. My favorite cartridge...well I couldn't choose just one so does my Gypsy count? I used a ton of different fonts to create the subway art.
Tuesday, October 11, 2011
Wednesday, September 28, 2011
Thank You Card
As I was reading on the Cricut blog I found out this Saturday is World Card Making Day! So perfect because I was needing to create a thank you card to my mom and her employer for all the paper they donated to my son's pre-k class. My inspiration came from Joy at Obsessed with Scrapbooking. Hers had a pear, but I couldn't resist the apple coming from a school!
Thanks for looking!
Tuesday, September 27, 2011
Haunted Trail Layout
I just completed this 2 page 12 x 12 layout. I am entering into the Cricut Circle's Monthly challenge which was to incorporate a window element. At first I had the haunted house with it's windows and thought that would be good, but then I got the idea of using a window as my journaling box!
The pictures are from a haunted trail my sister had started two years ago on the property surrounding her house. That year it was just our family, some folding chairs, and a tractors blinking hazard lights! It evolved last year and I can't wait to see what she has in store for us this year!
I cut the window from the October 31st cartridge and then used my scissors to cut it open. I traced a pattern for the vellum paper and cut it out by hand also.
Monday, September 26, 2011
Halloween Waterfall Card
Wednesday, May 18, 2011
Monster Party Invites
So every year around this time I get a phone call from my sister, Kolby's birthday isn't that far away, and I don't have any invitations...
So the theme was "Monsters" and this is what I came up with:
(I erased the address and phone # for obvious reasons)
This year she only needed 30 my 7 year old helped me glue on the 90 googly eyes.
I hope he likes them!!
Thanks for looking!
Thursday, May 12, 2011
Pop-Up Gift Card Holder
Here is a gift card holder I made for my niece who is graduation from 8th grade. The instructions for the base of the card came from Dawn's Stamping Studio. The snail is from Create a Critter and is 5". The stamp is from My Pink Stamper.
When you open the card up the gift card pops up at you!
Thanks for looking!
Wednesday, May 11, 2011
Teacher Gift Card Holder
I'm trying to wrap up Teacher Appreciation week. Here is my Crayon Box that I made to fit a gift card. I cut the box from TBBM at 5 inches. The apple was from doodle charms, I just used a scalloped circle to make the bite mark. Overall very simple and fun! Especially while watching the Thunder's win over the Grizzlies!! The stamp is from My Pink Stamper.
Here is a picture of the card open so you can see the gift card inside. Next time I will stamp before putting the box together!
Thanks for looking!
Monday, May 9, 2011
3-D Apple/Gift Card Holder
So this was a fail, but I'm definitely going to try it again! I saw this on one of the Cricut Circle contest entries and loved it! She used patterned paper and then tucked a gift card inside. I used the apple from the Give a Hoot cartridge and cut it at 3 1/2 inches (not big enough). I tried many different types of adhesive, but the hot glue gun was definitely the best. I used my Cuttlebug to emboss the apple with Swiss Dots.
Mother's Day Card
Just Because Card
I wanted to make a card that could hold a gift card and here is what I came up with:
Another super simple card! I just started by cutting my cardstock into a 11 1/2 inches x 5 1/2 inch piece. Scored the longer side at 4 1/2 and 5 1/2 inches. and then flipped the paper horizontally and scored it at 4 1/2 inches which when folded made the pocket for my gift card. I then cut a slit down the side of the pocket using my gift card as a size guide and then embellished the front and inside.
Thanks for looking!
Teacher Appreciation Week
This week is Teacher Appreciation week at my daughter's school. Monday was write a note to your teacher and now Tuesday is give them post its or stamps. So here is what I came up with, sweet and simple!
The owl is from the Hoot N Holler cartridge and is cut at 3". The stamp is from My Pink Stamper's Tweetie Hoo Puns, so cute and perfect.
Thanks for looking!
Sunday, May 8, 2011
Monday, April 11, 2011
My Scrapbook Room!!
So right around Christmas time we decided it was time to do some rearranging. Since our oldest son had passed away his room which used to be the center of all activity was empty, and our girls needed more space. So we ended up moving the girls into his room and our youngest son into their room which left me with my own little retreat!! The best part about my room is the desk. It used to be my son's bed (we put a 6 foot table where the bed went), my husband had built it for him to house his medical supplies. We cut out some of the middle part and it is now a perfect fit for all my scrapbooking collection. :)
My Christmas present this year were the hanging shelves. They are to house my cartridges, one is full and I'm quickly working on the second!
On this side of the desk are Lane's (my son that passed away) items that were on it in his room with a few additions so it's kind of my mini-memory area. The drawers underneath have my cords/mats, etc. for my Expression, the middle drawer has pictures, and the bottom drawer has my punches.
On the other side is my Imagine. Below it are my paper packs and mats for the Imagine, there is a drawer below, but it still houses some of my son's medical supplies. (I just can't let go yet) On the top shelves are photo boxes two per child, one for pictures and one for non-picture scrapbook items.
This is what it looked like before.
Thanks for taking the time to look! Hope you have a wonderful day!!
Wednesday, February 9, 2011
Berry Sweet
Another challenge! This week's challenge was to use an image 3 times in a layout and to use spray mist. I've been in a scrapbooking rut here lately, but this page was fun to make, now I've got to find my pics of the kids picking strawberries to put on it and add journaling in the fourth box. :)
Cricut Cartridges: Simply Charmed, George and Basic Shapes, Preserves
This is a 12 x 12 layout. I cut the following from George and Basic Shapes: large circle at 7" and the smaller circle at 6 1/2", the four large squares at 3" and the smaller squares at 2". The title was cut from Simply Charmed at 2". The strawberries were cut at 2", and the extra strawberry blooms were cut at 5", 4 1/2" and 4". I sprayed the strawberries, flowers, and title with Tattered Angels Old Lace Spray Mist. I love the sparkle! All the paper is from Stampin Up.
I hope you enjoy!
Tuesday, February 1, 2011
My Sweet Valentine
Here is my latest project. I was to design a Valentine's project that included something edible. I came up with this cute little tic tac tote!
Here is a picture of the contents including the tic tac toe board and the goodie bag containing the "Kisses" playing pieces.
And a little peek with all the goodies inside.
Cricut cartridges: Create a Critter, Sweethearts, Mini Monograms
The main part of the tote was made from a 5 3/4" x 8 3/4" envelope. I sealed the envelope and then cut it in half to a 5 3/4" x 4 3/8" size. Then I scored three sides (all except the open end) at 1". At that point I was able to make a nice pouch and just had to stick down the flaps left on the bottom. I then cut two 6" scalloped circles from Mini Monograms to cover the base of the tote and embossed then with Swiss dots using my Cuttlebug. I also inked over the dots with a little bit of white ink. I then made my tic tac toe board, the base was cute at 3"x 3" and then scored at 1" to make the board, I then traced the lines with a red marker and matted it with larger pieces of black and red cardstock. The ladybug is cut at 2 1/2" from Create a Critter. The heart with wings is also from Create a Critter and cut at 3". The label on the goodie bags is embossed using the hearts folder from Cuttlebug and then lightly inked with pink. The tag was cut at 2 1/2" inches from the Sweethearts cartridge. I used heart shaped brads to attach the handles and tag.
I hope you enjoy! I am loving today it's so cold outside and we are snowed in (10 or so inches) so it's a perfect day to craft!
Thursday, January 27, 2011
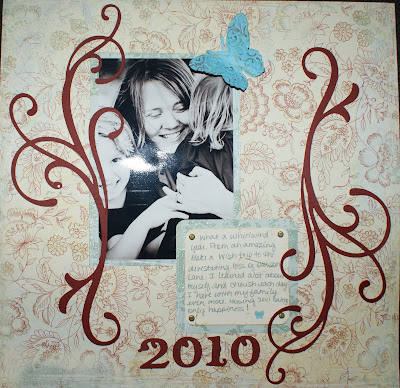
B.A.B.Y.
So this week's Cricut Circle Challenge was to create a layout all about myself using Brads (B), Aqua (A), Butterfly (B), and Yourself (Y). It wasn't as easy as it sounds, first of all good luck finding a picture of me, I'm always the one taking the pictures. Secondly, I miss my Gypsy! I didn't realize how much I depended on it until now! Hopefully my replacement shows up soon!!
Cricut Cartridge's Used: Home Decor, Disney's Hannah Montana
I cut the "borders" from Home Decor at 3 1/2". The 2010 was cut at 1". I used my Cuttlebug to cut out the large butterfly and then ran it through again to emboss it. I added brads to the corners of my journaling box for some dimension. (Details on the paper coming soon!)
I hope you enjoy! Thanks for looking!!
Monday, January 24, 2011
Welcome Spring Layout
Here is my second challenge entry. My Gypsy broke when I was finishing my last layout :( so I I used what I had. (I'm keeping my fingers crossed the new Gypsy arrives soon!) This challenge is for the Cricut Circle's Monthly Challenge. This layout is expressing my true desire for spring to come early! The rules included using 2 or more Cricut cuts, use a project seen on the Cricut Circle Blog for inspiration, and use products from two sponsors. My inspiration came from Michelle Lanning on December 27th, her layout was so beautiful, and I loved it, but I wanted to change it a little to bring on the warmth of spring!
Cricut cartridges used: George and Basic Shapes, French Manor, Mother's Day Bouquet, April Showers
This is a 12 x 12 layout. The tags were cut at 2 3/4" and 5" from George. The screen was cut at 5" from French Manor. The "Welcome Spring" was cut at " from April Showers, and the flowers were cut at 1", 2", & 3" from Mother's Day Bouquet. The paper is from Echo Park the line is called Life is Good. I used the i-rock and gems for bling from Imaginisce. I used pop dots to give the flowers some dimension, and added some matching ribbon.
I hope you enjoy! My little 2 year old was the model for this picture. She is so full of energy and loves the outdoors. Bring on Spring!!
Thursday, January 20, 2011
Cricut Circle Weekly Challenge
This was my first challenge, and I had so much fun creating this layout. The rules included following a sketch, adding buttons and stamping. Here's what I came up with:
Cricut cartridges used: Toy Story & Old West
This is a 12 x 12 layout. The journaling star was cut from Old West, the dark brown at 6 1/4", the khaki was cut at 5 1/2". Bullseye was cut from Toy Story at 3 1/2". Cowboy Up was cut from Old West at 2 1/2". The barbed wire was cut from Old West at 1" (I cut 4). I used the Cuttlebug to emboss the red paper using the Star embossing folder. The patterned paper is the All About Boys stack from DCWV. I weaved rafia through the buttons and made one button from the patterned paper.
I hope you enjoy! I almost forgot to add a stamp, so I found a perfect one from My Pink Stamper that says "Make a Wish!" This was Lane's Make a Wish trip so the sentiment was perfect under the picture of him riding the horse! Have a great day!
Subscribe to:
Posts (Atom)